
seasonal cork coasters
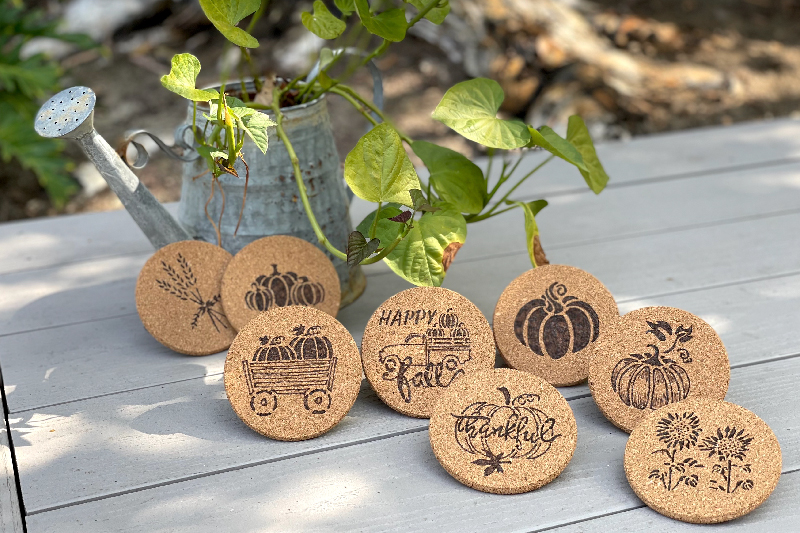
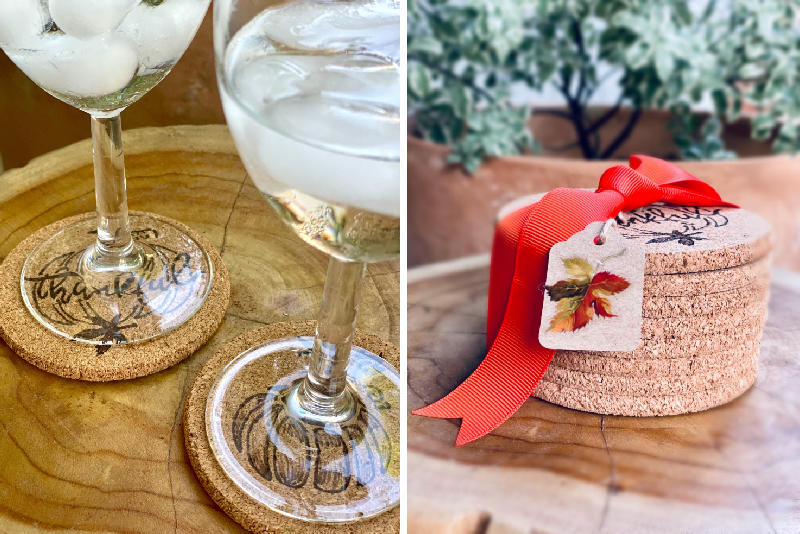
Happy Fall, ya’ll! Give basic cork coasters a seasonal theme with this simple create, just in time for gathering with friends and family. Make one set for home, and another as a hostess gift for Friendsgiving!
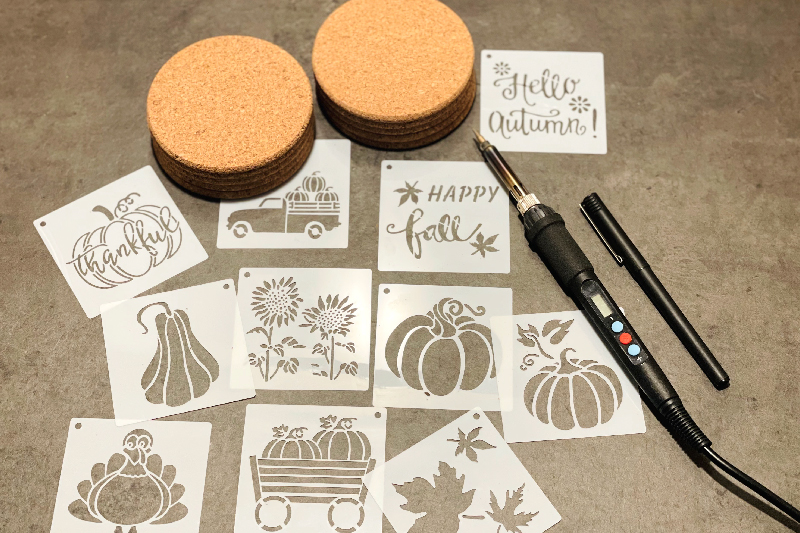
Materials + Tools
Cork coasters, available in craft stores or online
Reusable stencils, 3×3 inch (I got mine here)
Wood Burning Pen*
Pencil or fine-tip pen for tracing
Painter’s tape (optional)
Old cutting board to use for your work surface
*Wood burning kits for beginners run $10-$30, and then there are pricier models. All you need for this project is a basic, adjustable temperature wood burner (with a stand) and a few different tips to experiment with. Two simple options are here and here.
How To
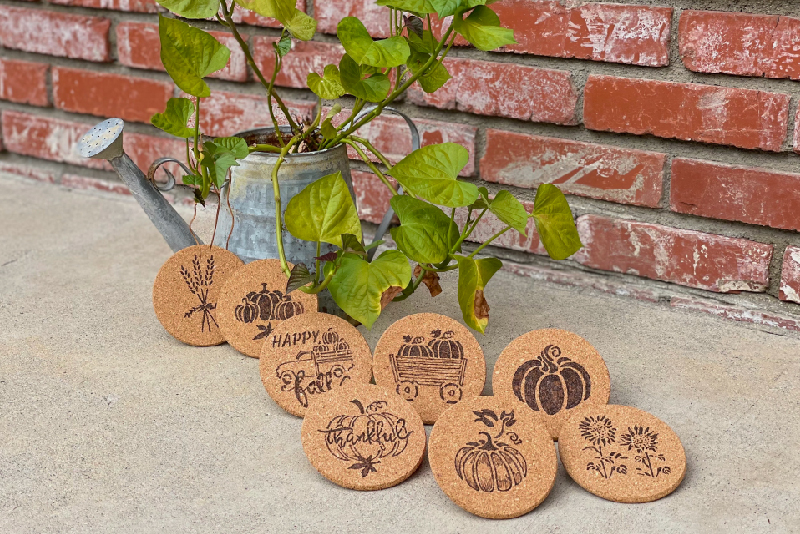
- Choose which stencils you like and lay them out on the coasters to see how they look. (The set I bought came with single stencils which made it quick and easy, no cutting needed.)
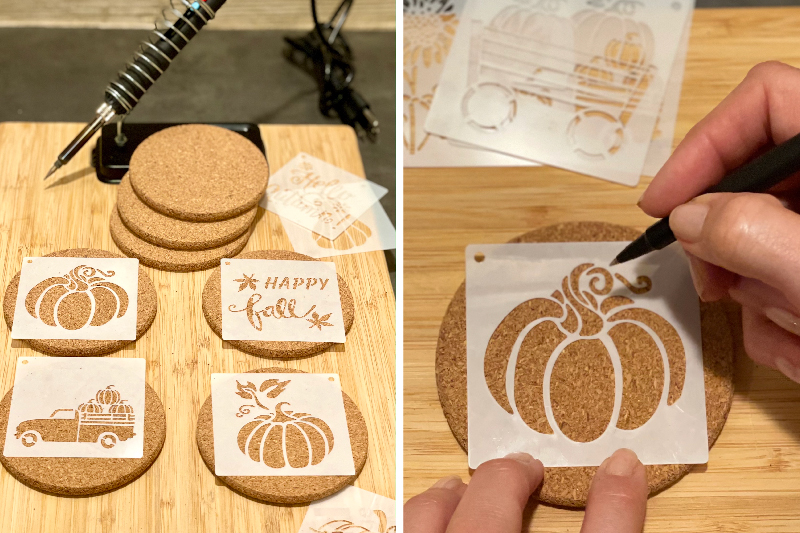
- Plug in your wood burner; it should take 1-2 minutes to heat up. Tip: Use painter’s tape to fix your wood burner stand to an old cutting board. That way it’ll stay put while you’re working.
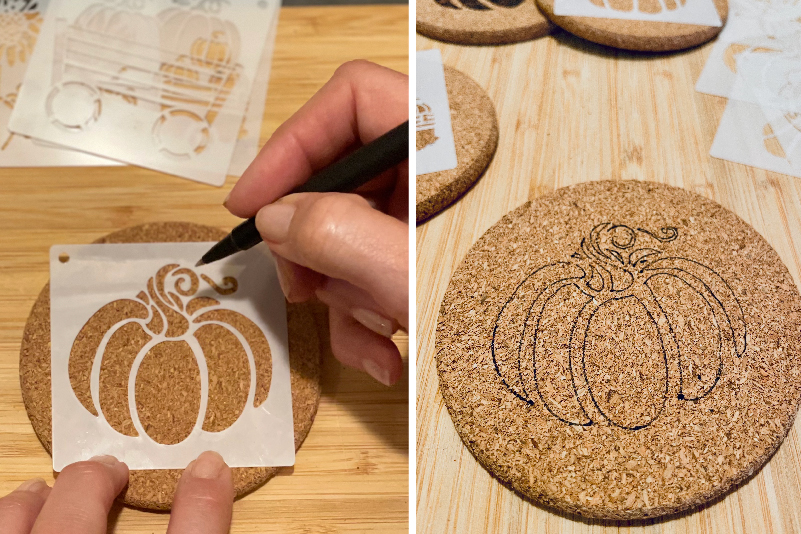
- Trace the pattern onto the coaster with a fine-tip pen. If you were making wood coasters, I’d say use a sharp pencil and trace lightly—but cork is soft, which makes it difficult to see the pencil marks. (Felt-tip markers tend to bleed & don’t work well for this.)
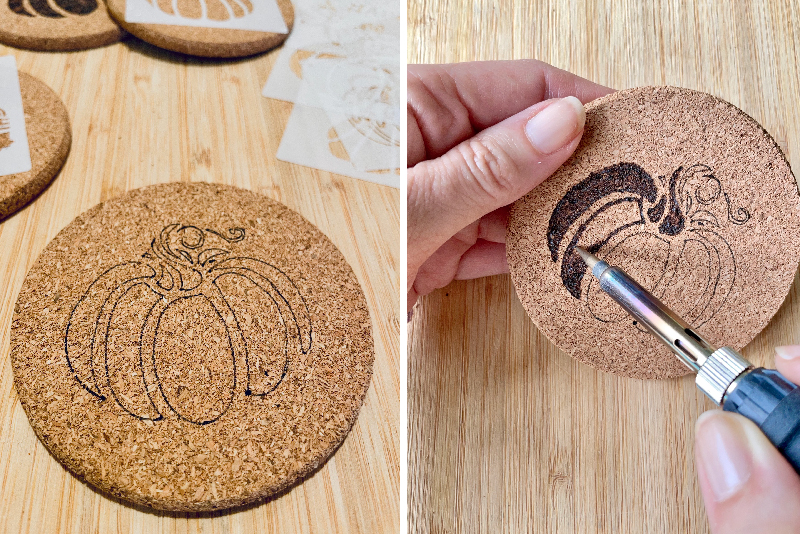
- Now it’s time to channel your inner kid! If you liked coloring, this will be familiar. Remember outlining the shapes first so it was easier to stay inside the lines? Yeah, that’s what you’re going to do now. The only difference is, you don’t have to apply much pressure to singe the cork. Gentle pressure and light, short strokes work best.


1 comments
Christina Hale | October 24, 2022
Great idea!!! I’m
Going to try !
Leave a comment
Leave a comment