
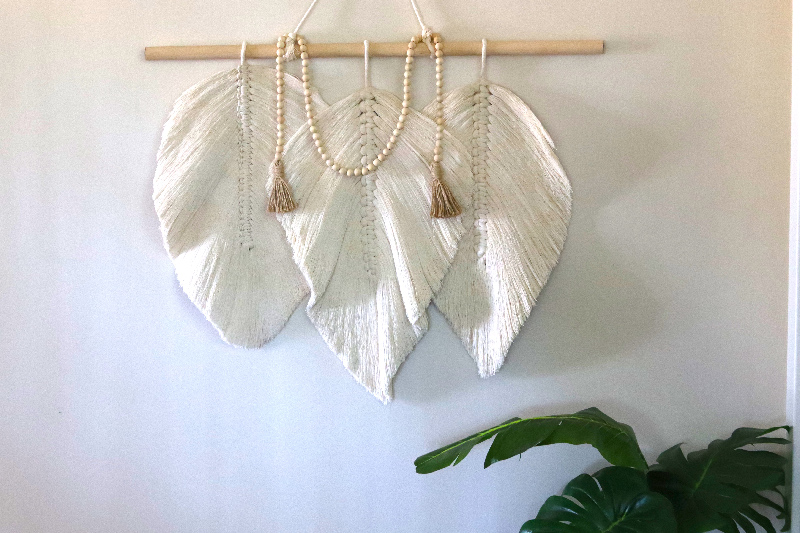
macramé leaf wall hanging
This is a fun and fairly quick project that allows you to express some artistic vision. Once you get the hang of it, it’s quite relaxing!
Macramé means “fringe” in Arabic. The art of macramé dates back to the thirteenth century when Arabian weavers started knotting the extra threads at the edges of loomed fabric.
Materials and Tools
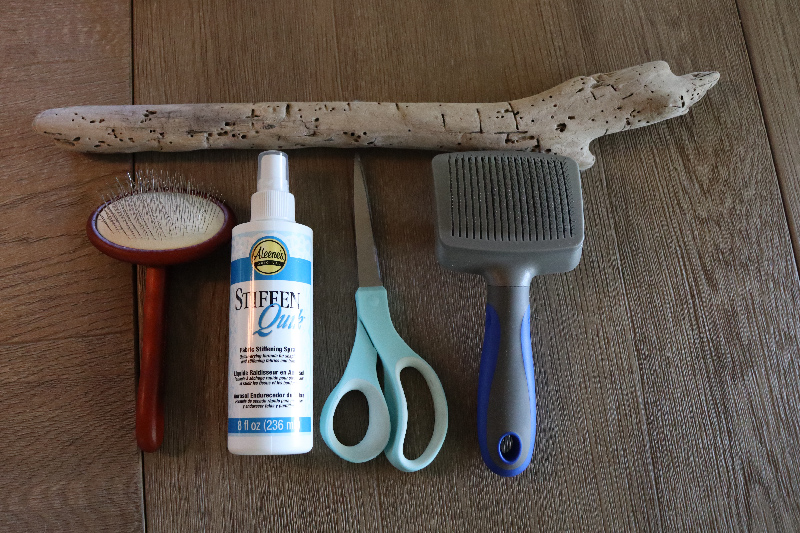
Dowel or driftwood, cut to desired length
Macramé cording (I used thicker cord; for a delicate finished piece, choose thin)
Fabric Spray Stiffener
Wire Brush (I used a dog brush)
Scissors
Instructions
- Decide the length and width of your project. Cut dowel/driftwood to that width.

- Cut the CENTER SPINE cording twice as long as your desired finished length. My finished length was 40” so my cut length was 80”. Since I used thick, 3-ply cording, I unraveled it and used only one-ply of the cord.
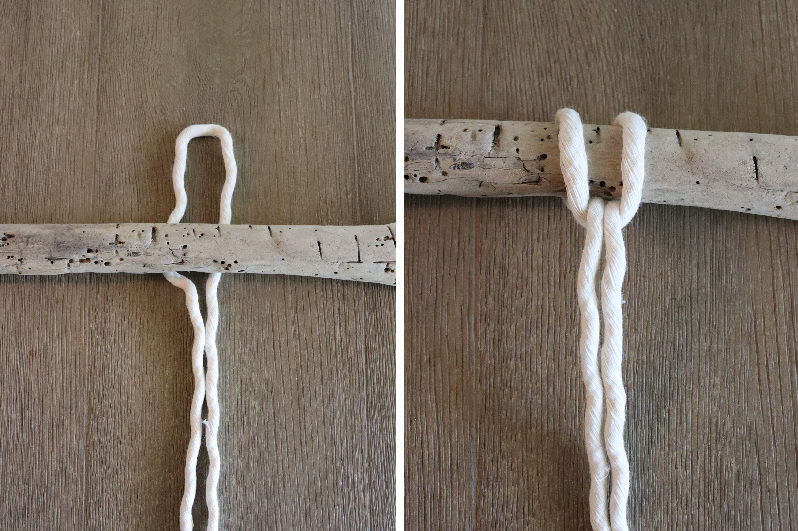
- To create the center spine, fold cord in half and position the dowel near the top. Do a fold-over loop (this is called a Larks Head knot). Tie the loose ends into a knot at the bottom; this is the center spine.
- Now cut the SIDE CORDING the same length as your finished width. My finished width was 36” so my cut length was 36”. You will need enough cut strands to work your way horizontally down the length of the spine cord.

- Here’s how to stack and tie the Side Cording onto the center spine:
- Step 5A: Take one folded strand and lay it horizontal with the loop end open under the spine.
- Step 5B: Take another folded strand and thread it under the first strand (on right) then over the spine and through the loop (on left).
- Step 5C: You should now have two loops threaded loosely around the spine. Pull tight to form a knot on the center spine.
- Repeat step 5 until you get to the end of the Spine Cord.
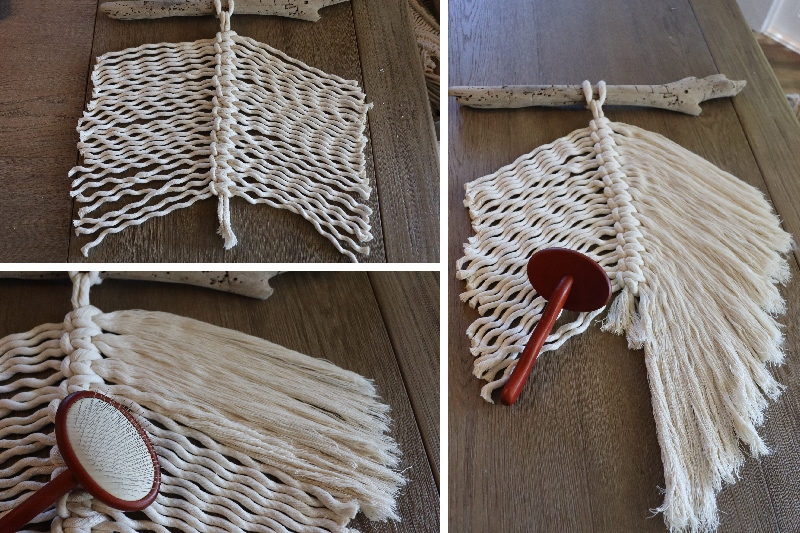
- Shape the Leaf: Make a pattern from cardboard or just freehand cut the leaf in whatever shape you like. A long, narrow leaf or a rounder, fat one—your choice. (Remember, this piece will hang, so the strands will droop and fall.) This is just a first, rough shaping.
- Now, using a wire brush, begin to feather and fluff out the strands. Taking small sections at a time, you just want to separate and comb out the braids until they are like coarse hair. As you brush and comb out, you will see the whole project soften.
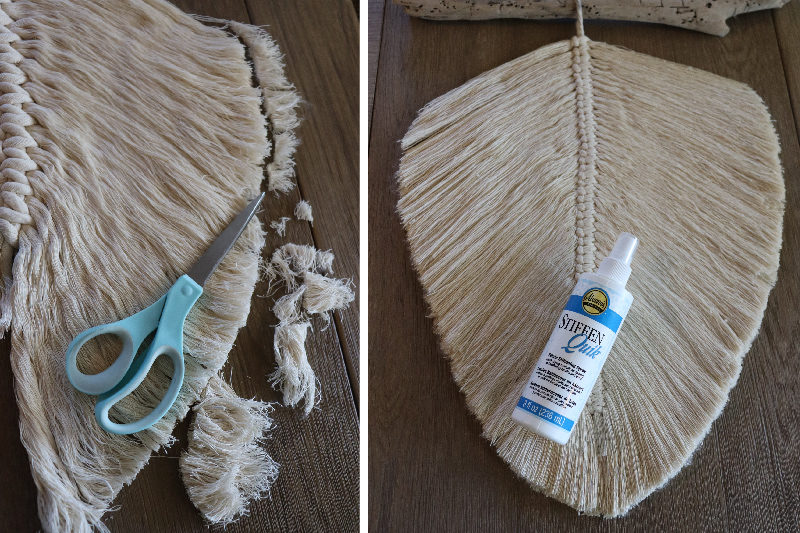
- Once the entire piece is feathered, trim and neaten out the edges to your desired leaf shape.
- Spray the leaf with Fabric Stiffener; let dry. Flip it over; lightly brush and spray again. Repeat step 10 until you are sure the leaf will stay in place when hung. If your leaf is quite large, it may require a leaf-shaped felt backing glued on the back to help keep its shape.
After it dries, hang your project and enjoy your handiwork!


2 comments
Tiffany | May 21, 2020
This is seriously so cute, Sheryl!
Sheryl | May 28, 2020
Thank you my friend. It was fun to make
Leave a comment
Leave a comment
Ann Marie | June 18, 2020
This is so cute - think I may do it with my Bible Study during the summer - thank you <3
Leave a comment
Leave a comment