
clay earrings

Everyone has certain items that they just can’t seem to justify spending a lot of money on. Nails, shoes, makeup, you name it. For me, that item is earrings. They’re so small and often have no valuable materials, so anything over $10 is hard for me to pull the trigger on. Luckily, it’s super easy (and addicting, fair warning) to make your own! They turned out so cute, and I wear them more than any other pair I’ve bought.
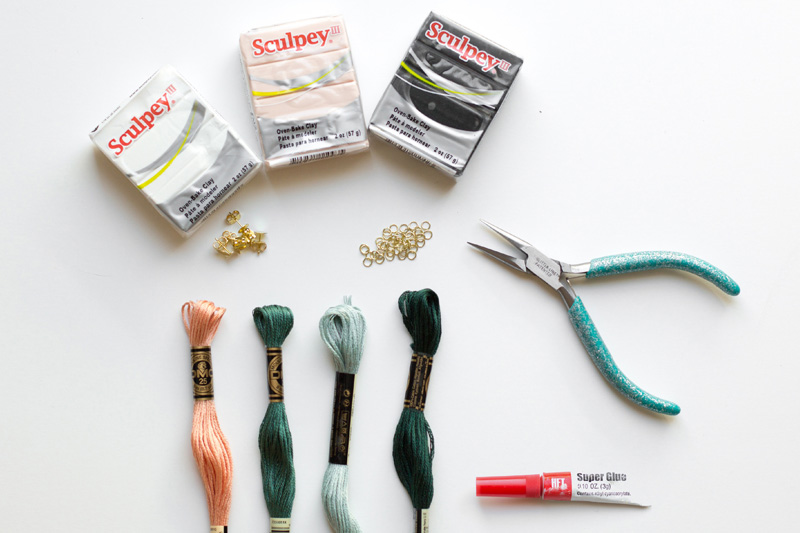
Supplies and Tools
(These supplies can be found at any craft store. I got mine at JoAnn.)
Oven-bake polymer clay
Earring posts or hooks
Jump rings (simple links for connecting jewelry pieces)
Embroidery floss or paint (optional)
Parchment paper
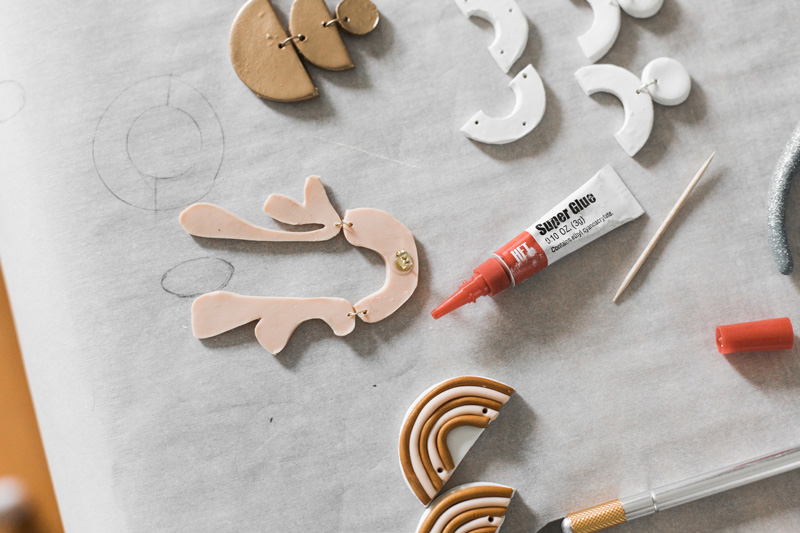
Super glue
Rolling pin
X-acto knife
Needle-nosed pliers
Instructions
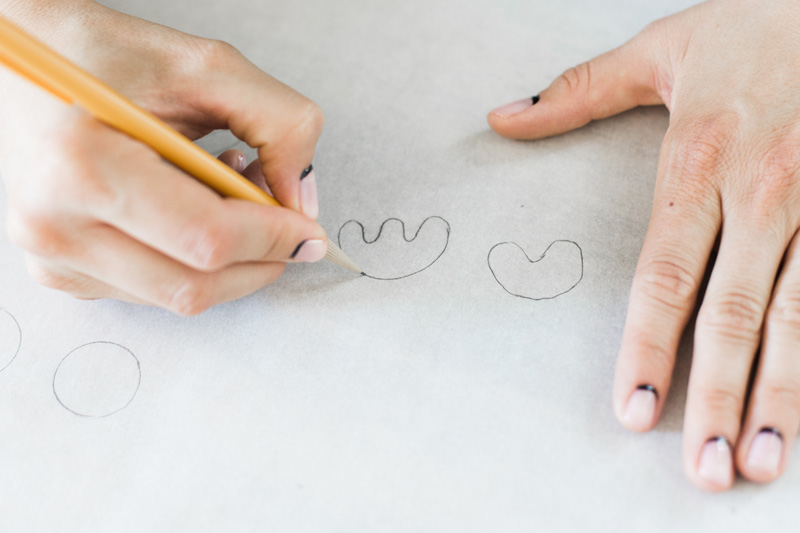
- Draw your designs on parchment paper and cut them out.
- Roll out the clay with a rolling pin and lay paper stencils on top. Pencil marks will transfer onto light-colored clay, so be sure the stencil is pencil-side up.
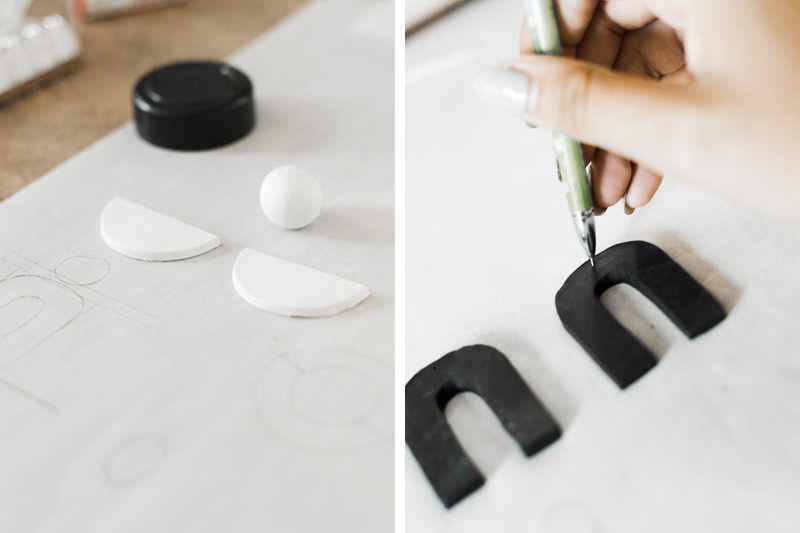
- Use an X-acto knife to carefully cut around the shape. For perfectly shaped circles, I used a variety of objects as “cookie cutters” such as a Chapstick cap, spice jar lids, or the large end of an icing tip (which made it easy to blow the clay out from the other end).
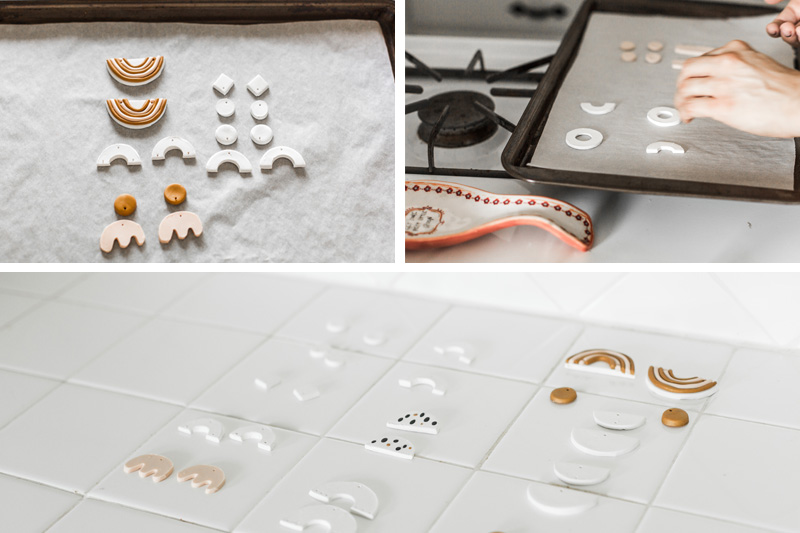
- Use a toothpick or metal skewer to poke small holes where the jump rings will go. (If you’re making hook earrings, be sure to include a hole for the hook.) Place the clay shapes on a parchment covered baking sheet. Bake for 5-8 minutes at 210 degrees. They should feel firm and rubbery to the touch, but not hold an imprint.
- Let them cool for a few minutes. They’ll harden up, will no longer be flexible, and the color will be slightly darker.
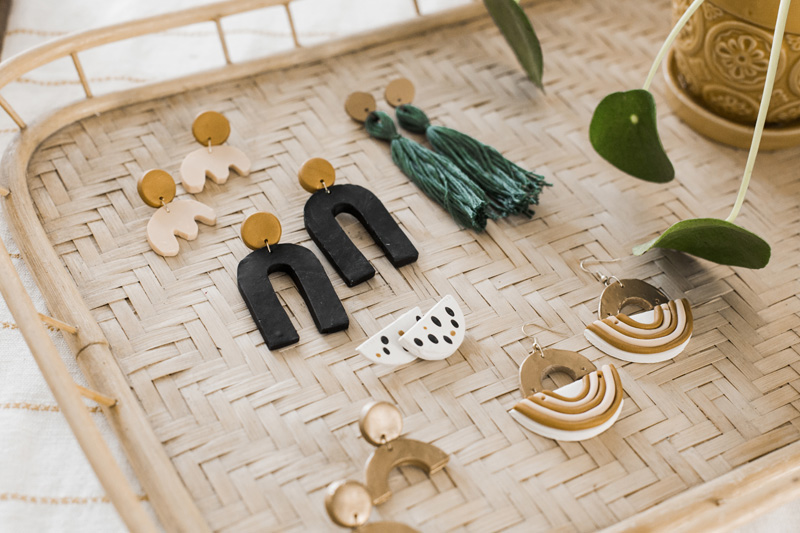
- If you want to paint any of your shapes, now is the time. I spray painted a few pieces gold.
- Using the pliers, pry open a jump ring wide enough to string through the holes to connect each piece of your earring. Pinch the jump ring back together to close. Add any tassels or designs you want. Be creative!
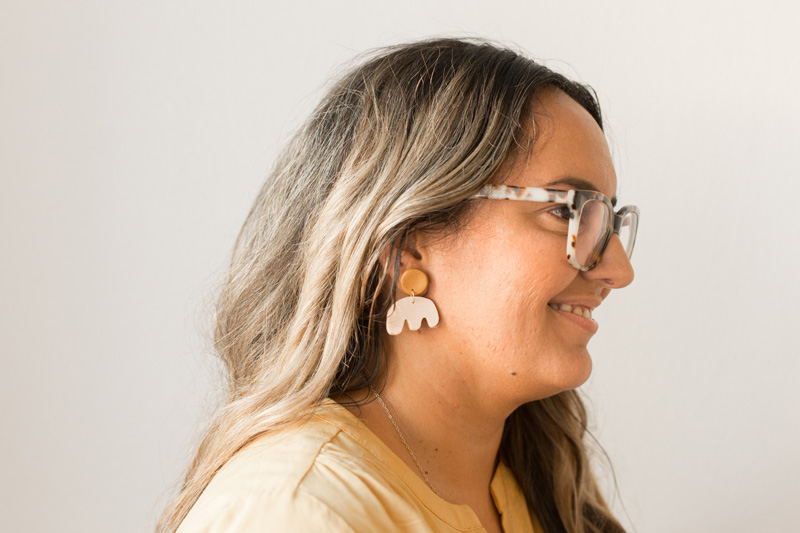
- If you’re making post earrings, add a dot of super glue to the back, attach the post and let it set. And you’re done!
Tips
- Polymer clay holds fingerprints, so try not to touch your shapes too much.
- Wash your hands before switching clay colors. I went from white to black and ended up with streaks on my black earrings.
- Oven temperatures vary, so check after a few minutes to see how it’s going.
- Clay will burn. If you see any sign of brown, take them out of the oven.
- After baking, you may need to re-poke the holes with toothpicks.


1 comments
Lisa | November 19, 2018
Coolio!!! Great Christmas present idea! Cheap and meaningful.
Leave a comment
Leave a comment