
charcuterie board DIY
Scroll through social media and you’re bound to come across photos showing off wood boards stacked with meats, cheeses and other nibbles beautifully arranged as though they effortlessly landed in place. These are Charcuterie Boards (my husband just refuses to use that word). The French word charcuterie (shar-coo-tree) is the art of arranging a deli of meats served as appetizers, or in place of a heavy meal. They can be really fun and creative, but if you want to purchase one, they are very expensive! So here’s how I made my own. This would also be a very thoughtful housewarming or wedding gift!
Materials and Tools
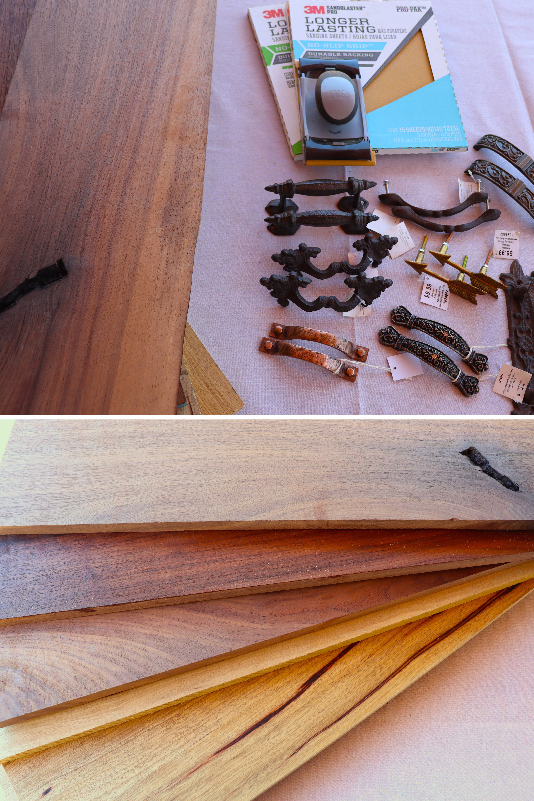
Wood Board – At least 18” long and 8-12” wide. Anything more than 1” thick will be too heavy.
Optional Handles (I found mine at Hobby Lobby)
Flathead Screws – the length you need will depend on the thickness of your wood.
Fine-grit Sandpaper or Sanding Block (between 180-220 grit)
Oil (I used olive oil)
Safety Glasses
Dust Mask
Power Drill
Orbital Sander (optional)
Instructions
- Choose your wood. Specialty lumber stores offers more exotic wood choices with interesting grain and wood tones. Check their scrap pile for bargains. Although “live edge” (bark still attached) is popular, it’s pretty hard to keep sanitary with food; so I chose a finished edge. NOTE: Most lumber stores will cut your wood to the size you need, so be sure to ask!
- Now that you have your wood at home, put on your safety glasses and wear a dust mask. (You have a mask, right?) Sand all the rough edges and surface with fine-grit sandpaper until smooth. If you happen to have a power sander, this will go faster. Be sure to sand in the same direction with the grain. Sand those corners and edges smooth—you don’t want sharp edges or chance of splinters.
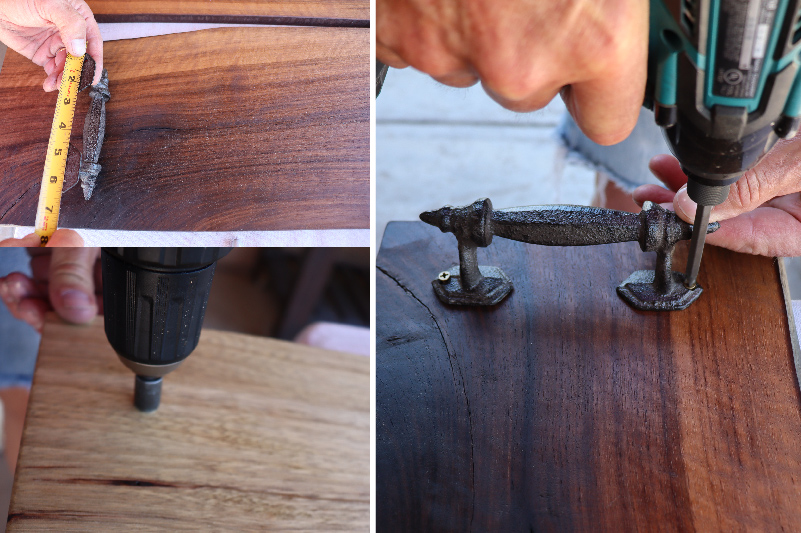
- Install the handles.* You don’t need handles—but they’re handy for moving the board around to serve guests. Measure and mark the position for screws. If the screws for your handle attach from the top, simply screw the handle in place. If the screws for the handle attach from the underside, drill a hole the same size as the screw. It’s helpful to countersink the screws (see how HERE) so you don’t have an uneven surface on the bottom of the board.
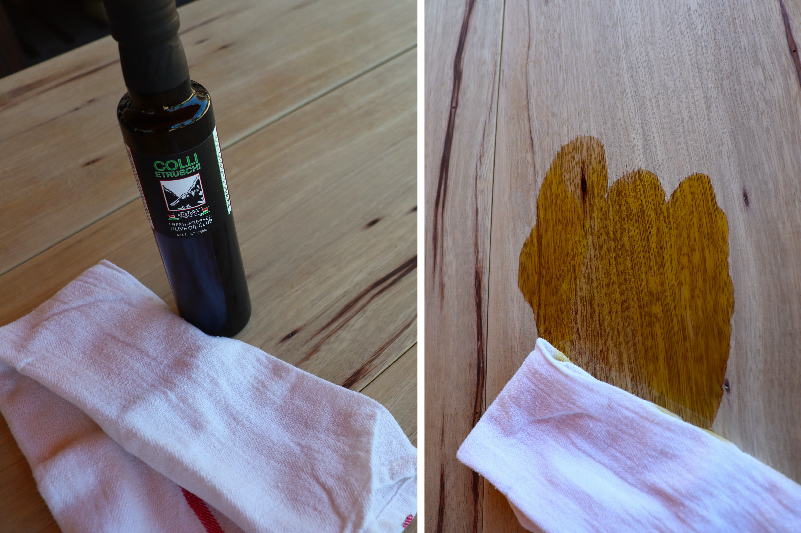
- Wipe down the board with a clean cloth. Finish by oiling it with wood cutting board oil and a clean, dry cloth. I used olive oil which also works beautifully. Apply several coats to thoroughly seal the wood.
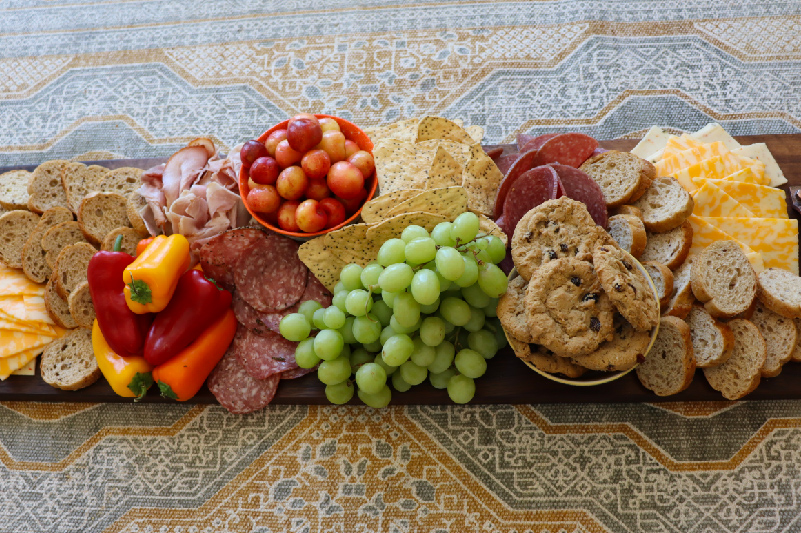
- Now your board is ready to use. I suggest layering a variety of sliced meats, chunks of cheese, small crackers, and perhaps include a small, pretty bowl of nuts, olives or chocolates to finish it out. You can easily google different ideas for charcuterie or dessert boards, so have fun and express your creativity!
* This will take some skill, so if you don’t own the power tools or know someone who does, skip this step. Your board will still be beautiful and functional without handles—and may just be easier to store when not in use.


1 comments
Sandra MacGinnis | August 28, 2020
Sheryl, You are so talented. Thank you for sharing. I love this idea.
Leave a comment
Leave a comment