
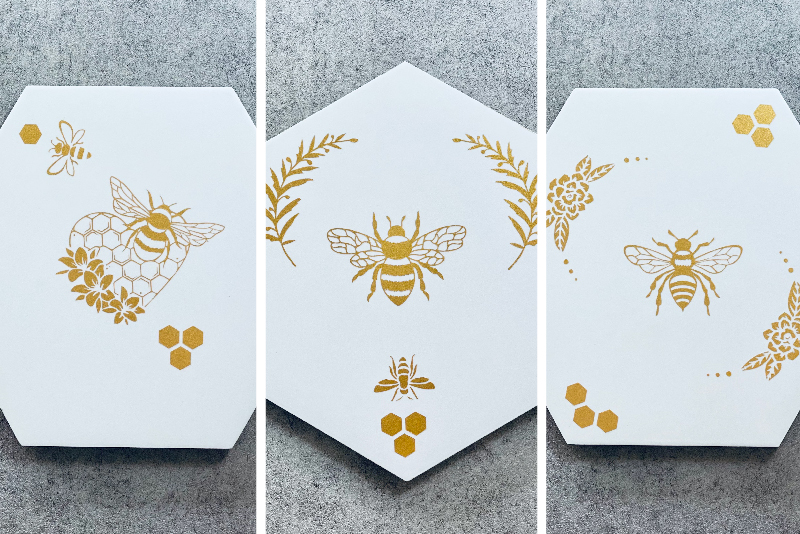
busy bee trivets
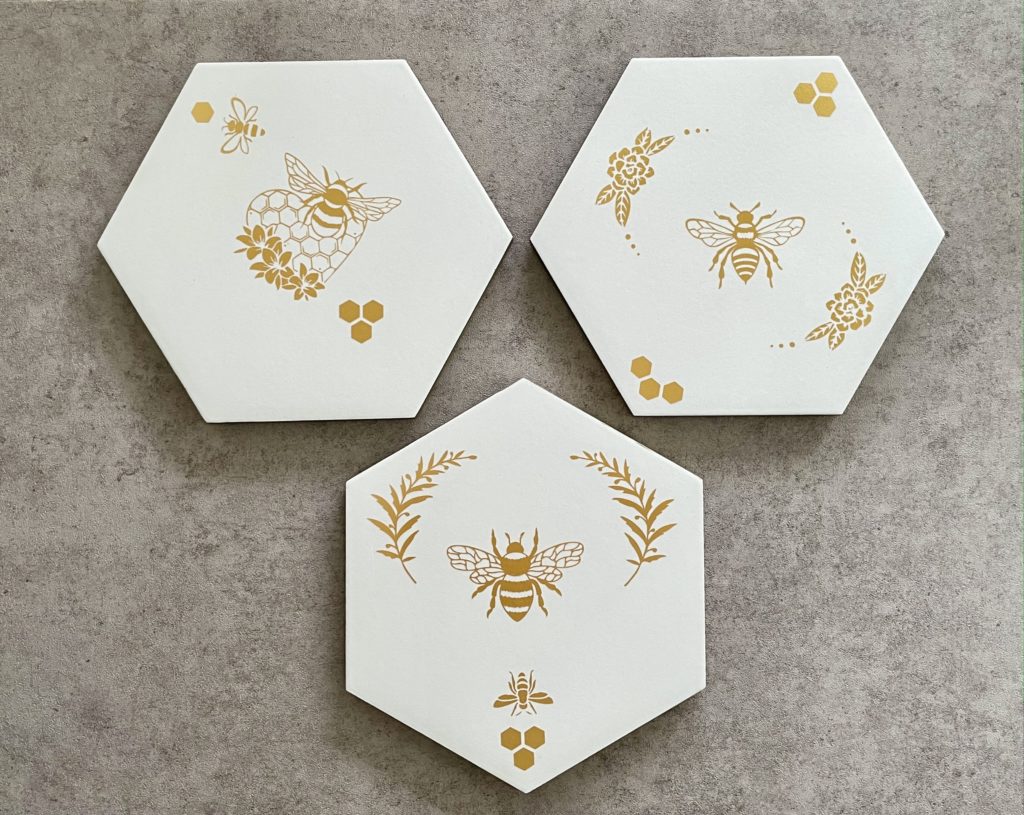
I had some tiles left after a home reno project that were too pretty not to use . . . hmm, what should I do with them? I know . . . let’s make some trivets! This simple DIY only takes an hour to create after gathering your materials. So easy and inexpensive, this would be a fun project for the kids too!
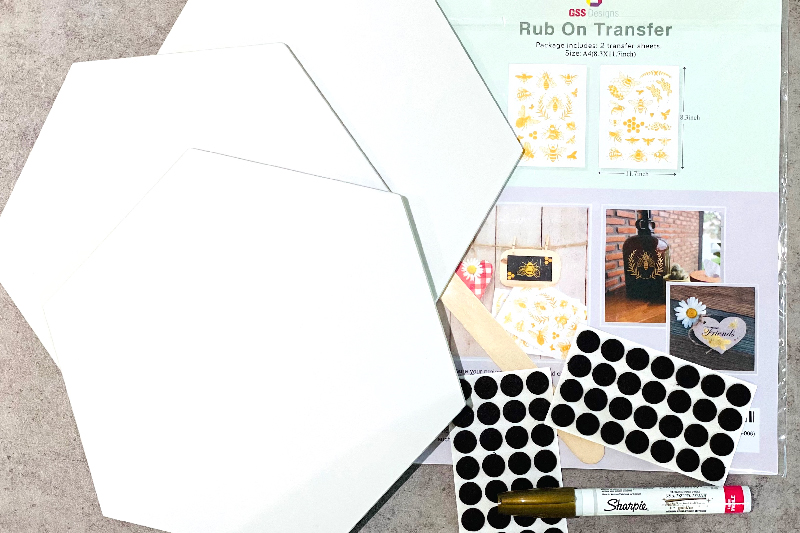
Materials
Ceramic Tile*
Rub On Transfer Decals, at craft stores or online
Popsicle stick or plastic scraper (your decal transfer set most likely provides one)
Felt Furniture Pads, at hardware stores or online
Sharpie oil-based paint pen, at craft stores or online
How To
*If you don’t have tiles to repurpose, you can find samples for a fraction of the cost (or free) at any tile shop or big box home improvement store.
- Make sure the tile surface is clean and dry. To give the trivet a finished look, simply use a Sharpie oil-based paint pen to color the edge of your tile. Let it dry for 2-3 minutes. Add a second coat if you want a more vibrant color.
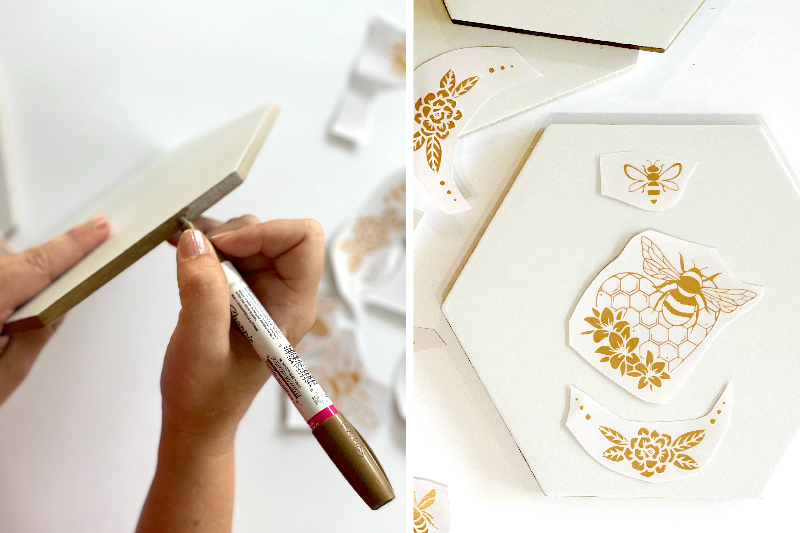
- Cut out the pieces you want to transfer; play with different pieces to get the arrangement you prefer. Peel away the white paper backing and position the transfer onto the tile.
- Use a popsicle stick or plastic scraper to firmly rub the transfer image onto the tile; be sure to rub all over the entire decal. Carefully peel away the plastic. If any area of the decal isn’t fully transferred, lay the plastic down and rub again. After you peel away the plastic, gently smooth the edges with your finger.
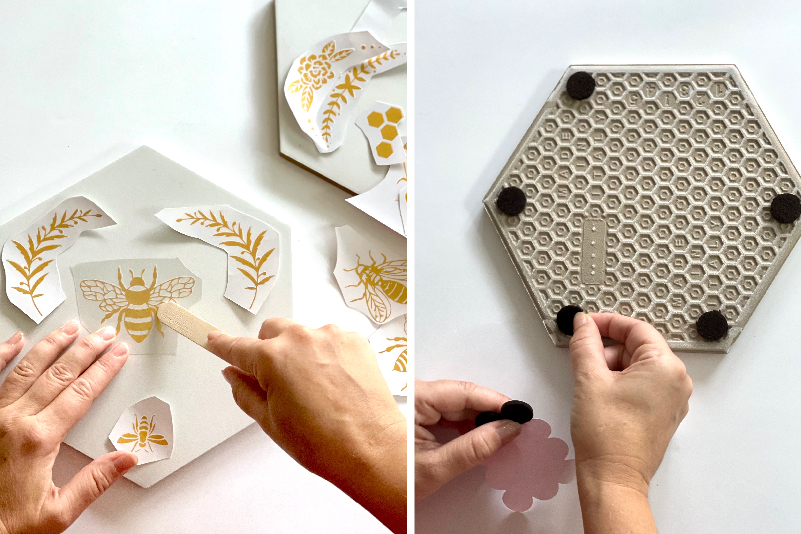
- Add felt pads to the back…and you’re done! If you prefer, you can use a sealing spray to protect the surface—but I didn’t find this step necessary. I tested mine for heat resistance by setting a hot dish directly on the trivet for 15 minutes and it was fine. To keep your trivet clean after use, simply wipe it with a damp cloth.


0 comments
Leave a comment