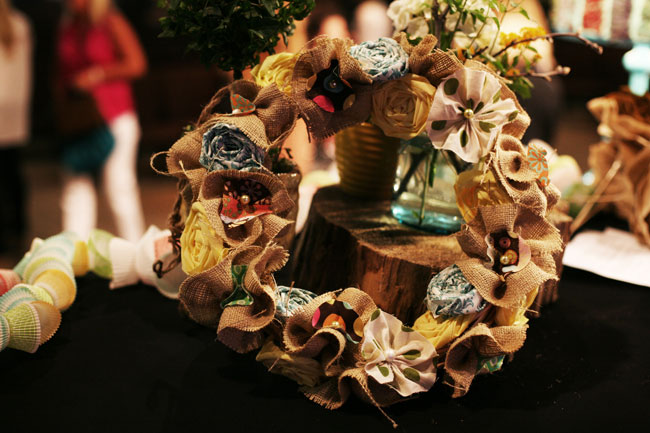
Burlap Flower Wreaths

There’s always something warm and inviting about a wreath on a front door. I love wreaths, and I love to change them out for holidays and seasons. Around those times, it’s easy to find them at a local craft store. But what about between seasons? Or the front-door greeting to party or shower guests? Or maybe, you simply like to have your own creative twist on the holiday or seasonal wreaths that welcome guests at your front door.
This wreath is so simple and adorable, and it can be made using your own design and style!
Supplies you will need:
- Fabric of different designs and colors. You only need small strips of each design.
- Burlap, about half a yard
- Foam or wicker wreath, 10–12 inches around (a foam wreath is thicker around, and can be found for about $4.00. A wicker wreath is thinner, but can be found at dollar stores.)
- Card stock
- Chalk
- Hot glue gun
- Twine
- Buttons
- Ribbons (optional)

Directions:
- Cut out three different size circles in the white card stock—small, medium, and large. These are going to be your flowers, so the size of the circles is completely up to you.
- Begin cutting your fabric and burlap into circles. Pin down one circle at a time onto the fabric of choice. Trace with chalk, and cut out the circles. Mix it up—some large pieces of burlap, some smaller. Cut out medium, small, and large fabric circles. You decide, because these will be your flowers and your design.
- Decide how long you want your wreath to hang. Cut your twine according to the length you decide on. Tie it around what will be the top of your wreath.
- Begin to glue your circles on top of each other with your hot glue gun, creating your flowers. Put a smaller circle in the center of a larger circle. Finish your flower by adding a cute button of choice to the center.
- Now that you have your flowers created, start to arrange and glue them to your wreath with the hot glue gun. Cover your wreath completely with your flowers.
- Add strips of twine, burlap, and ribbon to the top of your twine hanger, creating a bow at the top. This step is completely optional. If you would prefer hanging your wreath directly to the door, window, or wall, you can do that too. Just make sure you decide at the beginning because that will determine how long your first piece of twine will be (see step 3).
These wreaths can be designed any way you like. I challenge you to look up different ways to make fabric flowers—even rolled roses look adorable on these wreaths. No matter what kind of wreath you design, you are guaranteed to open your door to a smile and a compliment from your guest!
This wreath was featured in this Girl Talk video.


3 comments
Kristin | September 16, 2011
Love this... I have made several of your crafts over the past couple of months. I actually just finished another project with burlap so I have extra to use for something like this! Thanks for sharing! Blessings :)
Leave a comment
Jeanine | September 17, 2011
Thank you Kristen !! Im so glad you are visiting this website for craft ideas ! God Bless !
Leave a comment
Alyssa | September 19, 2011
I knew this was your project before I even read your name on it! I am definitely going to make this very soon! Love it!!
Leave a comment
Leave a comment