Wall Lettering Decals

I love the trend of three-dimensional wall decals! However, I do not love the price tag that comes with ordering a custom die-cut decal and installation. If you’re on a budget, have strong hands and a couple hours to get creative, this is a good way to go!

Tools and Materials
Foam poster board (find at any craft store)
X-acto knife
Good, sharp scissors (the ones your kids aren’t allowed to cut their Otter Pops with)
Self-healing cutting board
Command Strips

Instructions
- Print out your quote or phrase at the size you’d like it to be on your wall. I recommend you choose something very short—like, three words, max. Your hands will thank you later! I hand-lettered mine, but if you use a font, choose one with thicker strokes because this will make it easier to cut out.
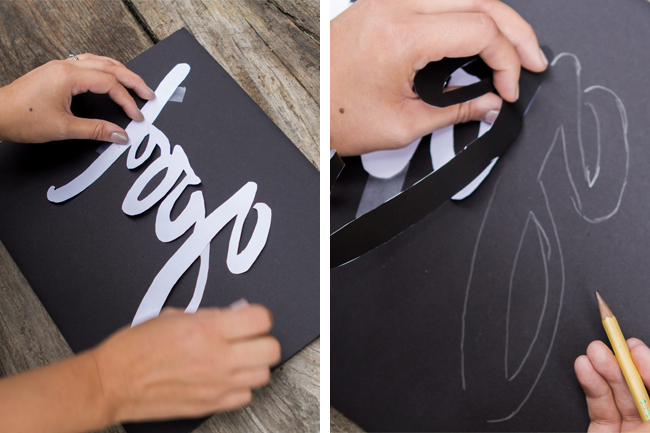
- With scissors, cut your words out of the paper; this will be your stencil. Tape the stencil onto the foam board (be sure the words are face down on the board).
- Trace the outline of the stencil with a regular or white-colored pencil. You don’t want to see any stray marks later, so be sure you’re tracing on what will be the back side of your phrase.
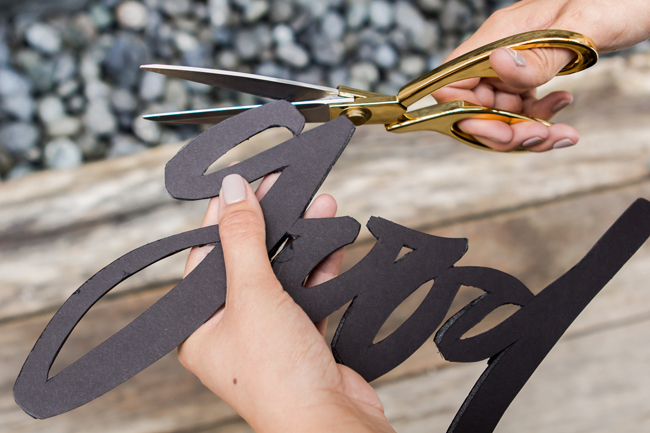
- Remove the stencil and cut along the lines with an X-acto knife. This doesn’t have to be perfect around the curves—just enough to release your shape from the foam board. It helps tremendously if your blade is brand-new.
- With scissors, trim any little corners you missed with the X-acto knife. Your hands may get tired, but the finished product will be worth it, I promise.
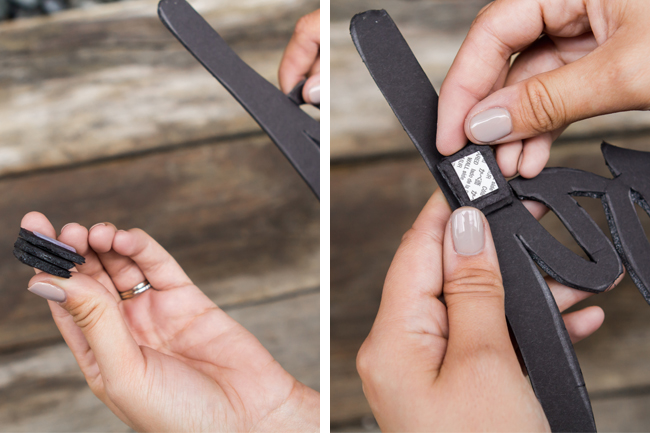
- Once your letters are cut out, make some “feet” or mounts so the decal will mount away from the wall. I made mine by cutting small squares and stacking them, three together, so each mount was the same height. Glue or tape these to the back of each word (in the thicker parts) and add an adhesive to them. At first, I used extra sticky 3M tape but it was hard to remove from my wall without damage—so I recommend using a Command Strip, cut into pieces.
- Mount your finished project on the wall (being careful to position it straight) and you’re done! These are light-weight, so they won’t fall off or damage the wall.


4 comments
Millie | September 15, 2017
What is this font? Really like it. Name?
Thank you!!
Kelsie Council | September 19, 2017
Hey Millie, this was actually hand-lettered, not a font. A font that has a similar style is Trendsetter, or any hand-lettered style font with thicker lines. Hope this helps!
Leave a comment
Leave a comment
Anastasia Abraham | September 25, 2017
Really love this! Awesome idea. Thank you for sharing craft!
Leave a comment
Lauren Winters | November 1, 2017
Hand-lettered, wow! I will make these for my bible-study gals. Thank you for the super cute idea!
Leave a comment
Angie Hahn | July 20, 2018
How beautiful and cost effective too! Thank you for sharing!
Leave a comment
Leave a comment