
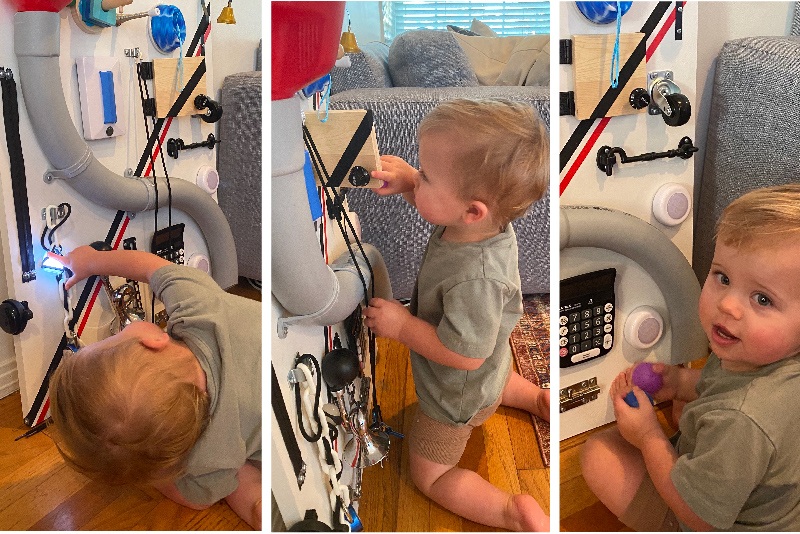
toddler busy board
Give a kid a toy, and they play with the box, right? Toddlers love to play with anything they see grownups use, and that’s the idea behind these busy boards. I bought two for my littlest grandsons so they could stay busy while mom homeschooled. But you can easily create one from spare items you have on hand. Here’s how to make your own.
Tools and Materials
Board – Use ¾” MDF (medium density fiberboard), plywood, or even an old cabinet door.
Toxin-free Paint + Clear coat sealer (optional)
Colored electrical tape
Screws, Velcro, Adhesive Magnetic Strips or Liquid Nails for fastening items to the board.
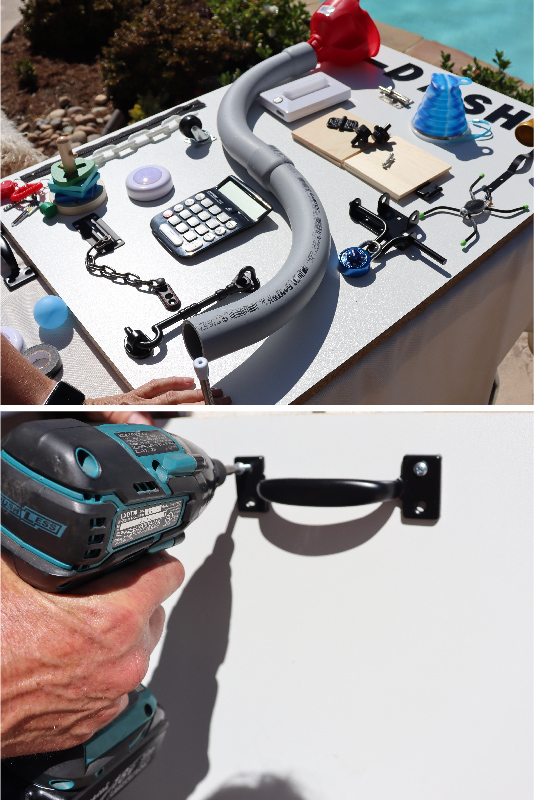
Metal handle
Tape Measure
Power drill
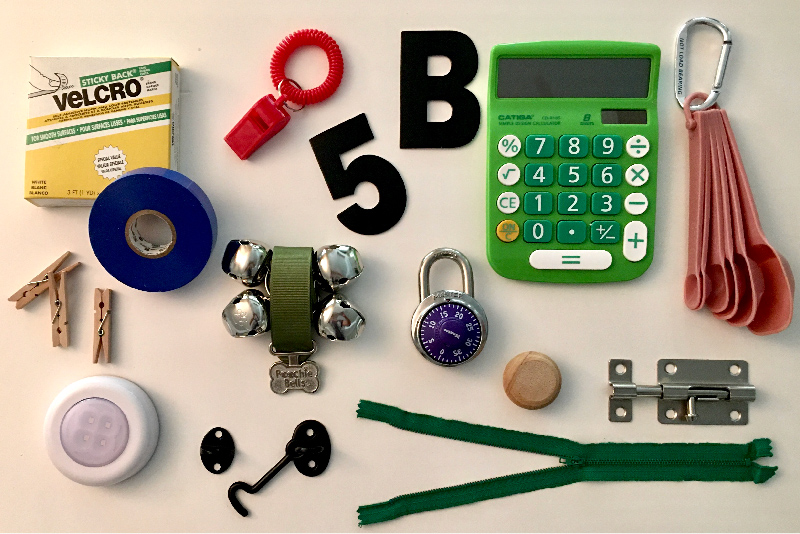
Busy items:
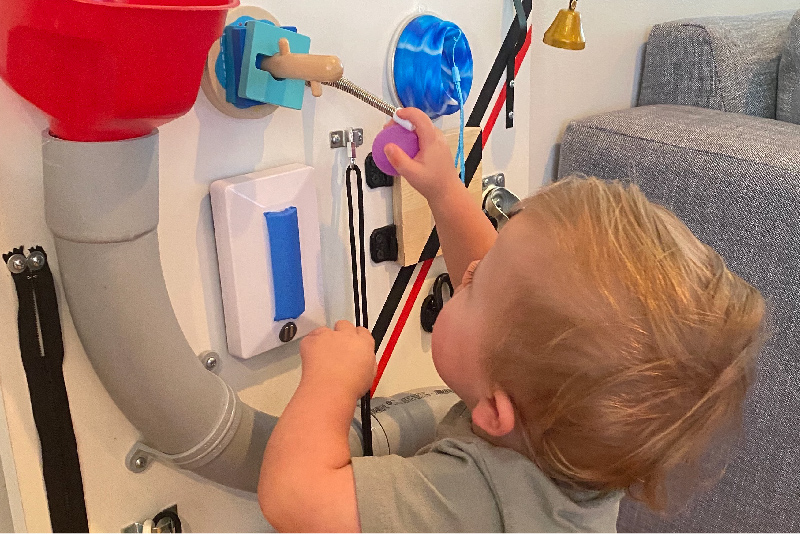
Plastic, wood, or metal safe objects that spark interest with no detachable pieces or rough edges. Zippers, latches, wheels—anything that turns, clicks or opens is a great idea!
Look around the house/garage for spare items you already have; simple objects like those battery operated push-on lights, plastic measuring spoons, old padlocks. Take a look through your local hardware store for safe and creative things you can use. Plumbing tubes for ping pong balls; caster wheels, bicycle bells. The possibilities are endless!
Instructions
- Decide what size board is best for your child. These boards are mounted or leaned against the wall, so it should be as tall (or smaller) than your child’s height.
- Make sure the edges are smooth and splinter-free. Paint the board if you like; adding a clear coat sealer will make it easy to wipe down for cleaning. Be sure to use toxin-free products.
- Now the fun begins! Lay out the items on your board, playing with the arrangement so each piece fits nicely. I used colorful tape for borders and stick-on letters for their name. Children love color and it makes the board more appealing. TIP: Take a photo so you’ll remember where everything goes.
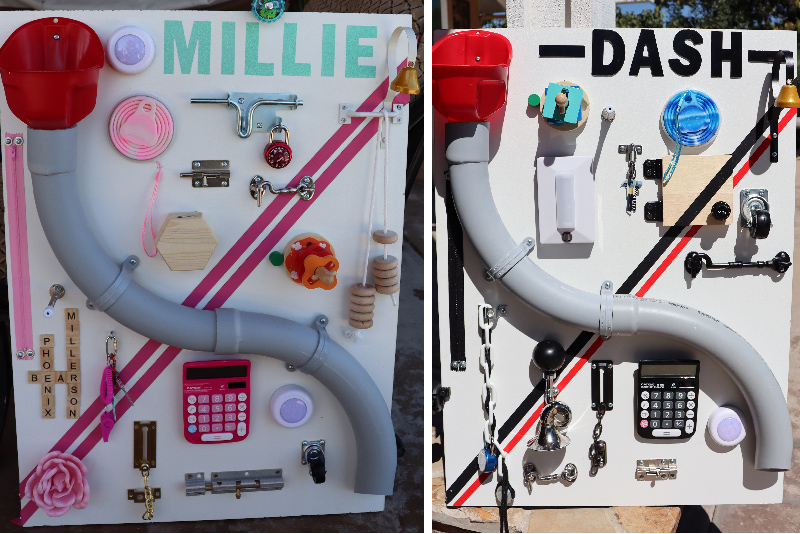
- Safely screw, glue, or use Velcro to attach each item in place. I suggest fastening a handle on back of the board so you can easily move it from room to room.


0 comments
Leave a comment