
pressed flower pumpkins
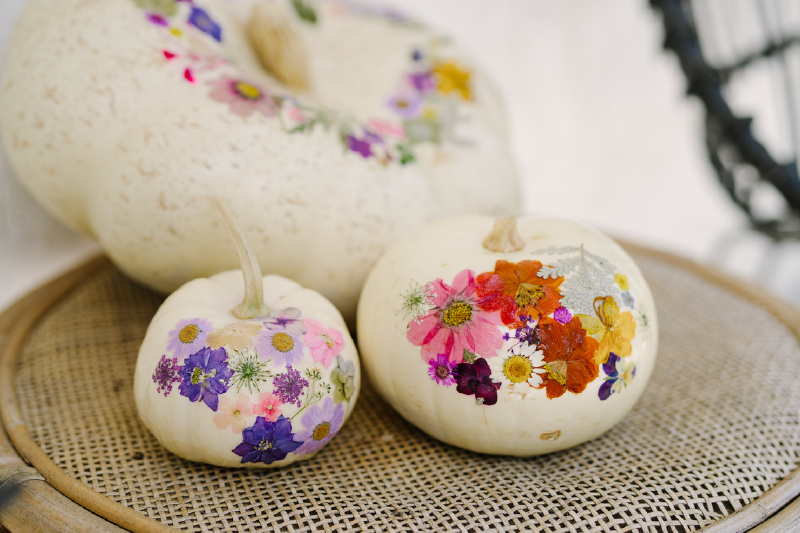
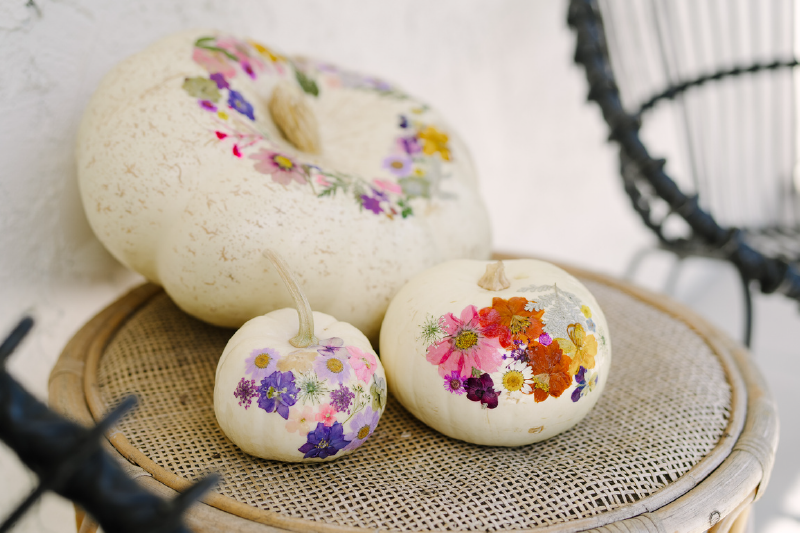
One autumn craft I love is creating pressed flower pumpkins. They are so sweet and simple to make. These pumpkins are stunning autumn decor that can easily move from October to November. I plan to use mine as centerpieces for our upcoming Friendsgiving celebration. This affordable fall decor hack is a fun craft to make with a group of friends.
Materials
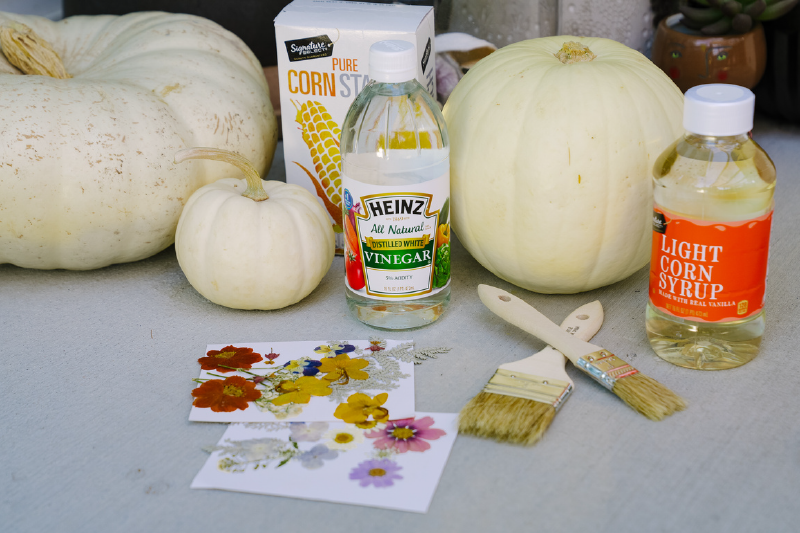
Pumpkins, any size + shape
Pre-pressed flowers (available online here)
Paintbrushes
For glue:
1 ½ cups water
2 tbsp corn syrup
1 tsp vinegar
2 tbsp cornstarch
Directions
- First, you will need to make your own glue. Begin by bringing ¾ cup of water, corn syrup, and vinegar to a boil in a saucepan. In a separate bowl, mix the cornstarch and remaining ¾ cup of water. Gradually add the cornstarch mixture to the boiling mixture on the stove. Bring to a boil again and cook for one minute. Once done, remove from the heat. And allow it to cool before storing it in a sealed container. It is best used within 3 days.
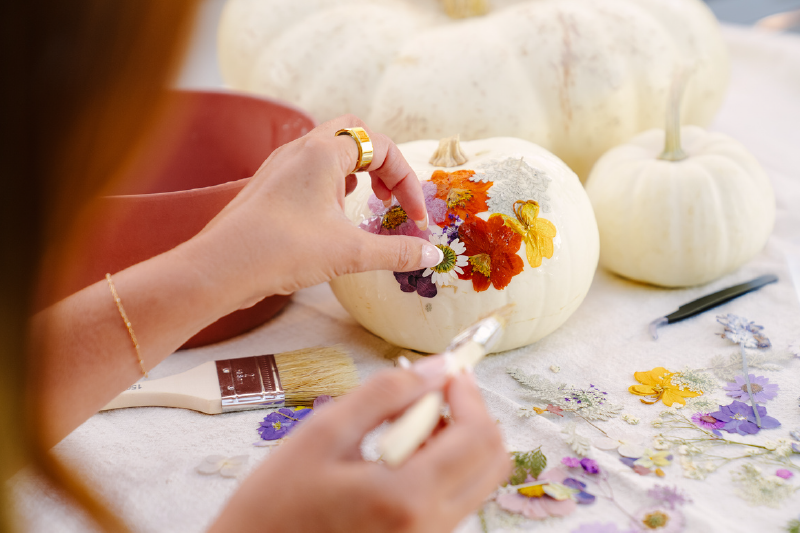
- Now that you have your glue, it’s time to apply the flowers. Use a paintbrush or pastry brush to apply a thin layer of glue to the area where you’ll be adding flowers. Gently place each flower on the pumpkin where you want them and apply another thin layer of glue over them. Allow pumpkin to dry for 3-4 hours. Voilá! It’s this simple and easy!
- It’s worth mentioning that these pumpkins are not entirely rain-friendly, so it is best to keep them indoors. I hope you enjoy making these lovely pumpkins as much as I have!


0 comments
Leave a comment