
Mini Christmas Trees
 This is a really easy craft that can give your Christmas decorating a modern touch. I like to display them in my home and on my desk at work at Christmastime. I originally got this idea when my boss created punch-out cards that assemble to make 3D Christmas trees. I love wood décor, so I went out to Michaels and got the thinnest yet sturdiest wood I could find and re-created them using wood instead of paper cards. I love how easy and quick this was, and how nice they look as decoration!
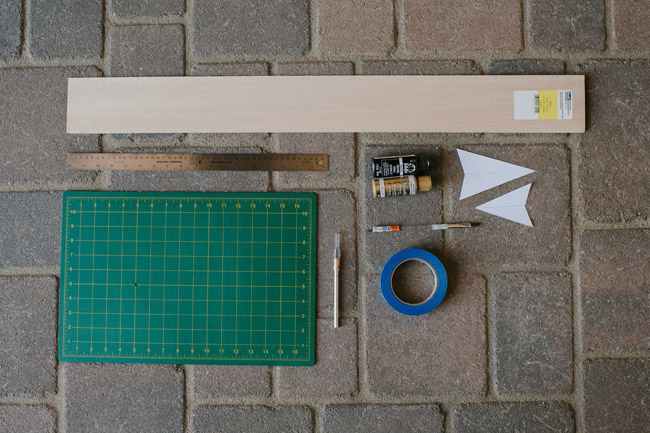 Materials:
- 1/16″ thin balsa wood
- X-Acto knife
- Craft paint
- Paintbrush
- Painter’s tape
- Self-healing cutting board
- Ruler
- Pen or pencil
- Paint marker (optional)
- Rubber number stamps (optional)

 Directions:
- On a scratch piece of paper, draw your tree shape with a pen or pencil, using your ruler as a guide. I made my big ones 4″ at the base and 5″ tall and my little ones 3″ at the base and 3 1/2″ tall. At the halfway point, I drew a line from base to tip. Make a mark on that line about 1/2″ up from the base. Then cut straight angles from the corners of the base to that mark.
- Take out your balsa wood and place your paper templates on it. I found that 1/16″ was a good thickness because it could be cut through with an X-Acto knife, but could still stand on its own. It is fragile, so be careful not to crack it or force it. With your pen or pencil, lightly trace the shape of the triangle. It’s best to line up multiple trees together on the wood so you make as few cuts as possible.
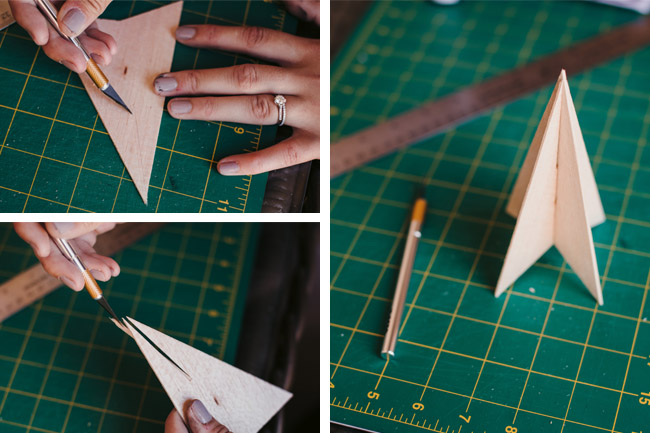
- Line up your ruler with the lines on the wood and carefully cut along the ruler with your X-Acto knife, and cut out your shapes.
- Take two of the same size triangles and place them next to each other. Make a mark at the halfway point from base to tip on each.
- Using your ruler again, cut from the tip to the middle mark on one tree, and from the base to the middle mark on the other tree. You’ll want to make these lines about 1/16″ thin, so you can fit the two trees together.
- Slide the trees into each other to make them fit together. Again, don’t force them if they don’t fit; simply adjust your slits as needed.
- You’re done! If you want, you can take them apart and paint them, using painter’s tape to create straight lines. Have fun with it! Make sure you do not use spray paint, as balsa wood absorbs it right up and it bleeds all over the wood.
Another idea is to make them into an advent calendar set, using a rubber number stamp to mark each day. On the back of your trees, you can write activity ideas for the family.


0 comments
Leave a comment