Dress Your Walls

Here’s a simple way to treat your walls to a new outfit without breaking your budget.
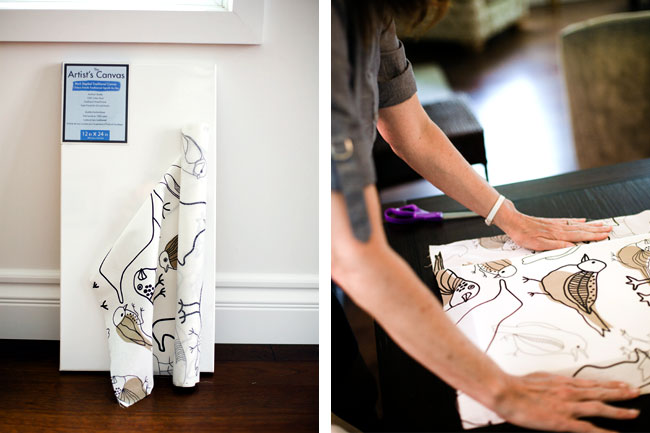
I wanted to bring some fresh elements into my living room that would be fun and just a little retro. I chose colorful fabric, stretched and stapled over canvas, to make instant "art." I made three panels for my wall.
This easy project would be great for a child’s room, or you could create a custom headboard—let your own style and imagination be your guide!
Supplies:
- Artist’s canvas, already stretched on a frame—choose the size and quantity to suit your project
- Fabric—lightweight material is ideal
- Fabric trim or frame (optional)
- Scissors
- Iron
- Staple gun
Directions:
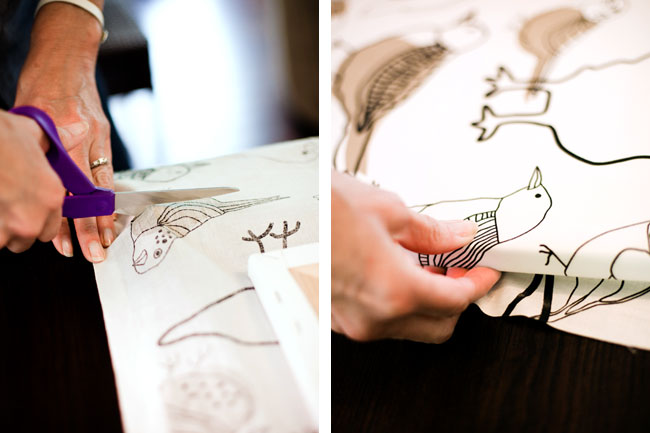
Lay the artist’s canvas on your fabric, taking care to position the fabric pattern on the canvas just the way you want it.

Cut the fabric three or four inches bigger than the canvas. This will give you extra fabric to make small adjustments in the position of the pattern before you staple it.
Smooth out any wrinkles with an iron.

Lay your trimmed, pressed fabric face-up on top of the canvas and check the position of the fabric pattern again.
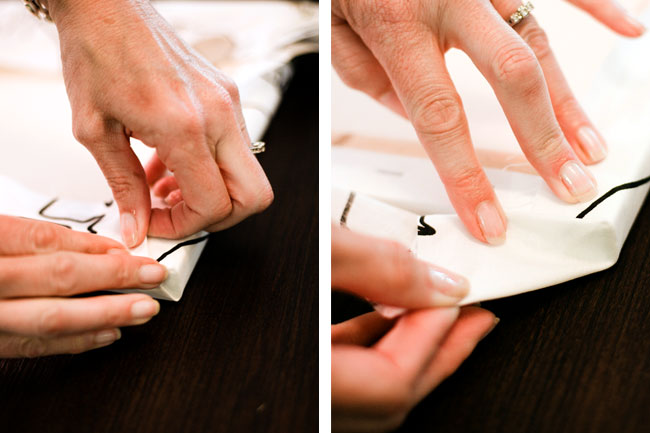
Hold the fabric and canvas together at the sides and turn them so the back of canvas is facing up. Now you’re ready to staple the fabric to the canvas frame.
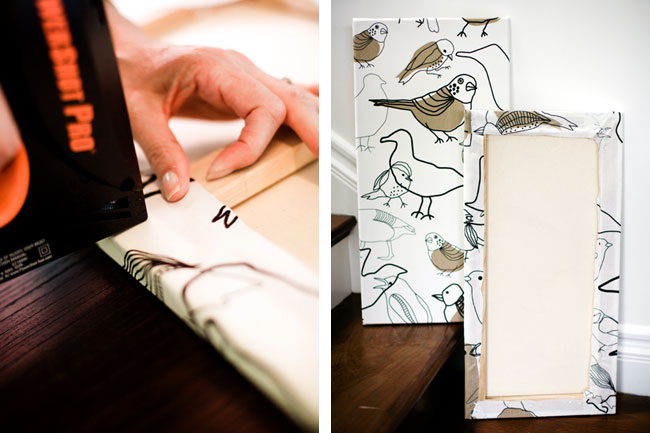
Pull the fabric gently on one side and staple it in the center of the frame. Now pull the fabric tight on the opposite side and staple it in the center. Do the same on the top and bottom.

Next, pull the fabric over each corner to form a neat edge (just like wrapping a package) and staple in place. Stretch and staple the rest of the fabric all around the edge.
Voila! You’re done!

Optional step: I chose to leave my panels untrimmed, but you may want to add a decorative trim as a finishing touch. Simply cut the length of trim needed to go around the edges; use a glue gun or fabric glue to tack it in place.


3 comments
Lisa Singer | October 6, 2010
Leah, I love the fabric!
What a great idea!!
Leave a comment
Tiffany | October 12, 2010
This is such a great way to add to a wall without spending too much, and you can switch it up for the seasons! Love it!
Leave a comment
Jo | October 26, 2010
This is a great idea, thank you so much.
Leave a comment
Leave a comment