
balloon garland
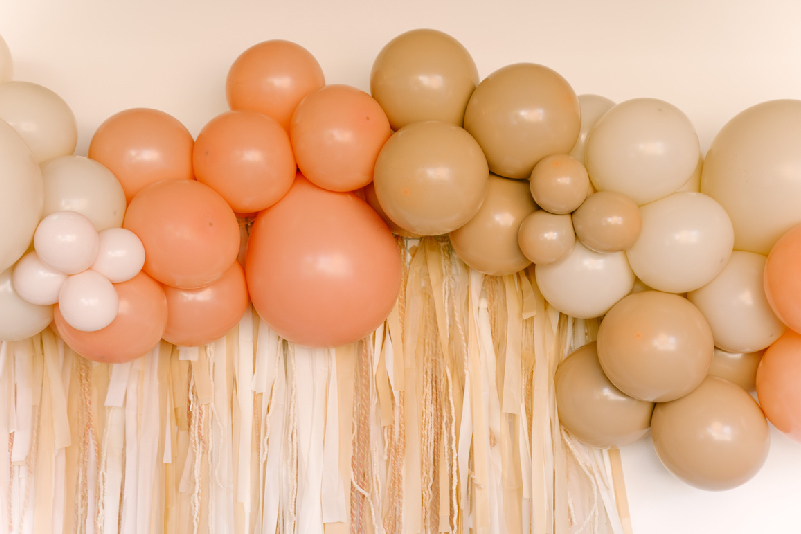
Balloon garlands add a festive touch to any special event. We show you how to create your own, along with an optional fringe backdrop.
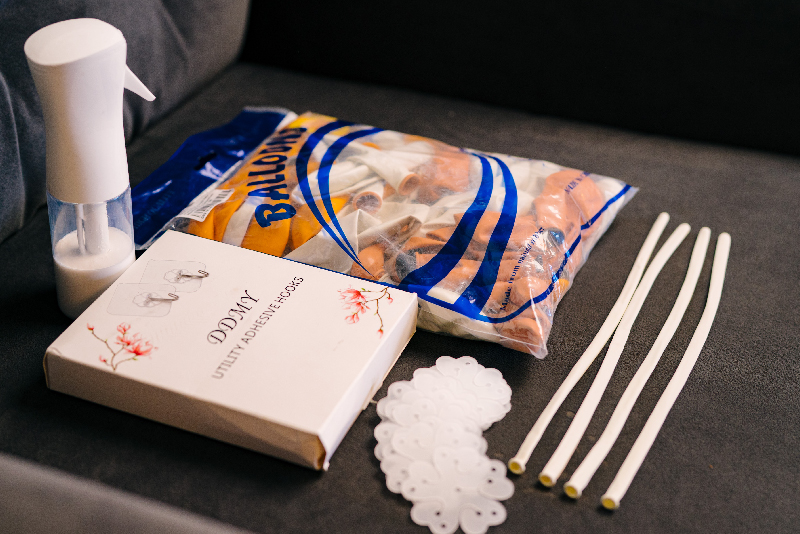
Materials and Tools
Balloons, in a variety of sizes/colors, online here
1 pkg of long balloons, online here
Removable hooks
Hi-Shine (optional) online here
Balloon clips**
Balloon pump online here
How To
- Inflate a pair of balloons. As you do this, lightly press the balloon against your chest to let out a small amount of air to create a nice, round shape. Don’t try to make each balloon the exact same size.
- Tie the ends of each balloon together to create a joined pair.
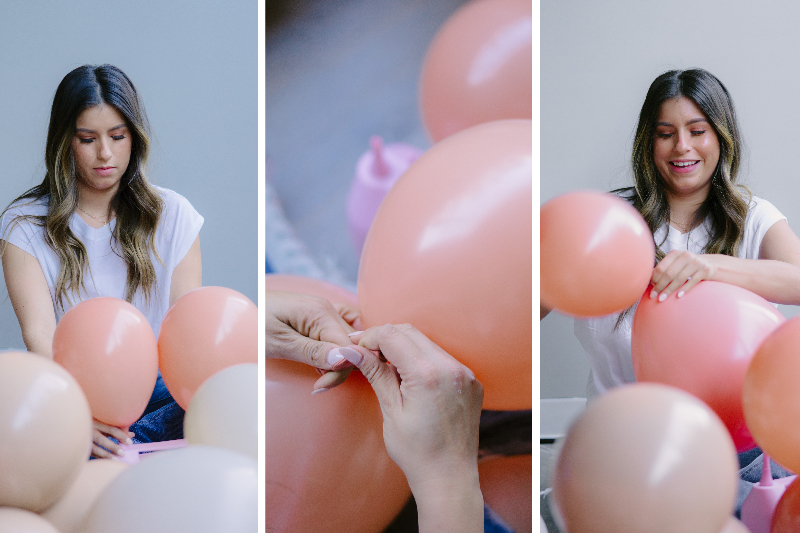
- Repeat step 1 + 2 to make three balloon pairs.
- Take your three pairs and twist them around each other so they stay together to form a cluster of six balloons. With a little practice, this step will go faster. Make as many clusters as you like.

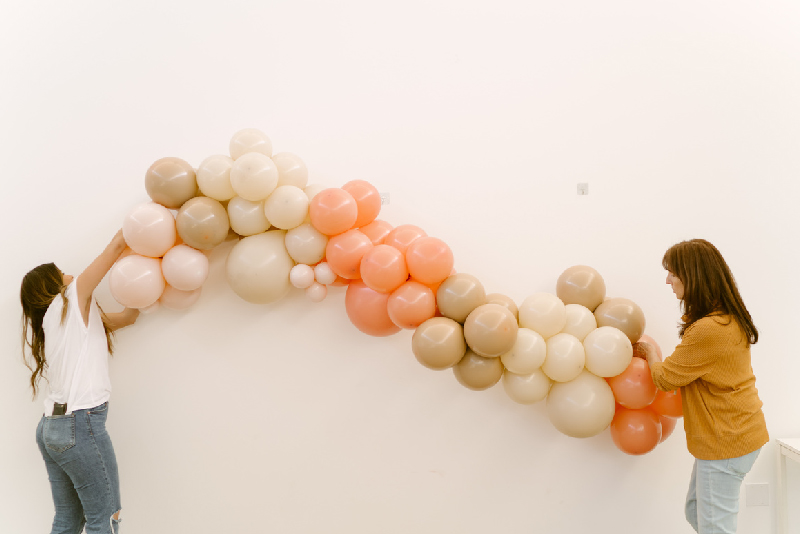
- Now you’re going to join your clusters together, using the long stretchy balloons (you won’t inflate these, they will just be for tying). Start by knotting the end to one of the balloon clusters—thread it through a second cluster, stretching it a bit as you go—then bring it back to the first balloon you tied it to. Now you have 2 balloon clusters joined.
- Repeat this process with all the clusters to form a garland. Where there are small gaps, use smaller balloons to fill the space.
- Now it’s time to hang your garland. Position removable adhesive hooks on the wall where you want to display your garland. Tie a few long stretchy balloons on the back of the garland to use for attaching it to the hooks.
- Once it’s in place, spray with Hi-Shine to give the garland a glossy look if you like.
**The balloon clips pictured in the materials photo are used to create a cluster that looks like a flower. We didn’t end up using them, but you might want to!
Optional fringe backdrop:
Materials and Tools
Disposable plastic tablecloths 54×108” online here
Tulle, Yarn, Decorative Items (optional)
Plastic fencing, online here
Removable hooks
Scissors or Rotary Cutter, online here
How To
- Decide how long you want your backdrop to be and cut plastic fencing to that length. I hung the fencing on a wall using thumb tacks to make the assembly process easier, but you can lay it out flat on the ground too.
- Cut the plastic tablecloths into 2-3” wide strips in a variety of lengths (4 feet, 6 feet, 8 feet). Do the same with any tulle, yarn, or decorative garland you may want to add. It takes a lot, so if you have a few extra hands it will go much faster!
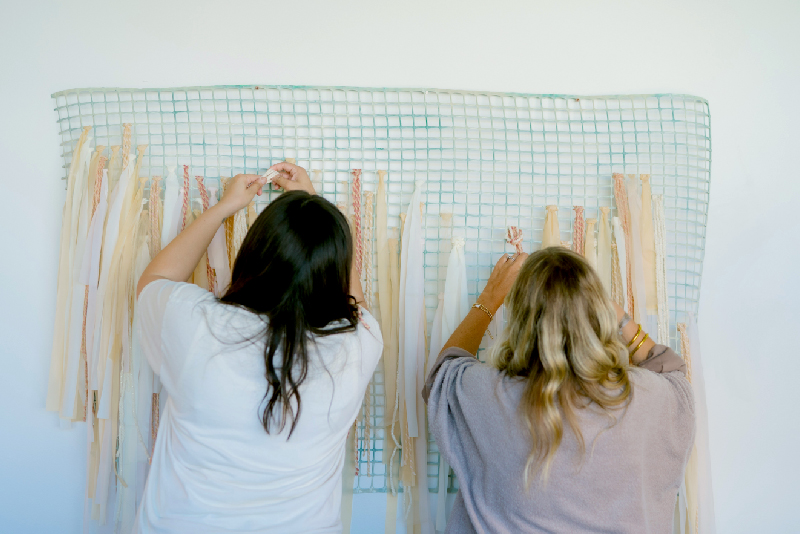
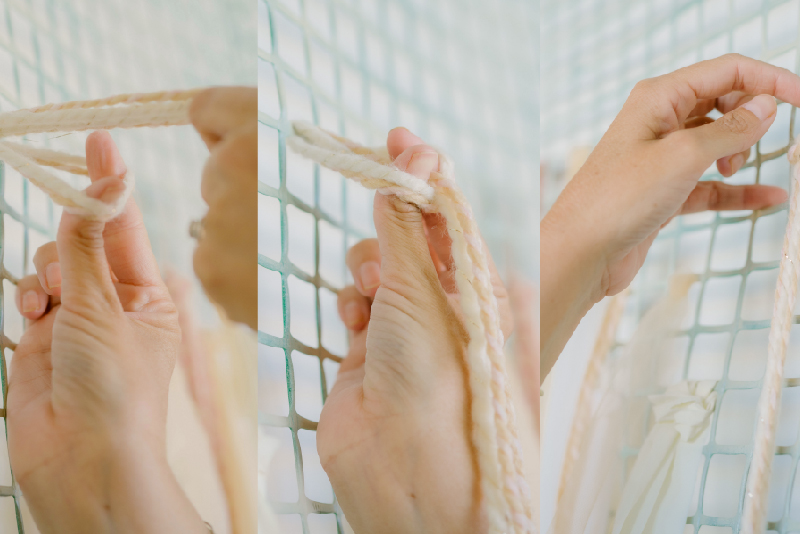
- To assemble, start from the bottom and work your way up. Use the longest strips on the bottom rows, the medium strips in the middle rows, and the shortest strips on the top rows. Feel free to vary the location of strips a bit to get different levels of fringe. Fold each strip in half and thread it through the hole just enough to form a loop; then pull the loose ends through the loop to form a “cow hitch” knot. See how HERE.
- Repeat this step until you have covered the entire piece.
- Hang your fringe backdrop by itself, or with your balloon garland to create a great photo backdrop for your guests!


1 comments
Cathe | October 25, 2022
Kate and Kristin,
I love how you made this sound so doable! I am ready to give this a try myself.
Love your creativity and choice of colors made it so pretty!!!!
Leave a comment
Leave a comment